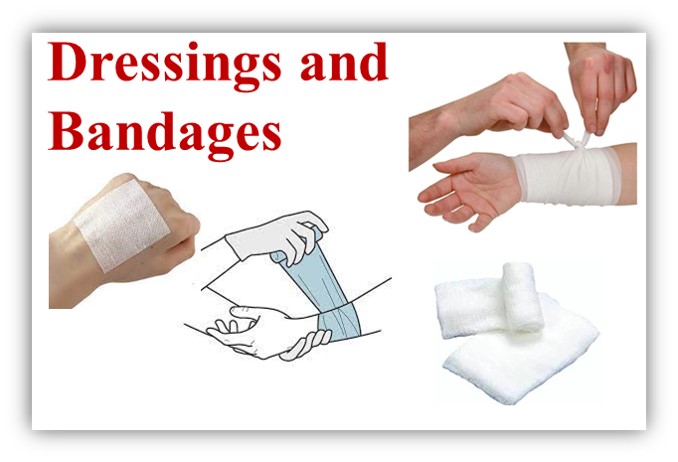
Dressing
A dressing is the immediate protective cover placed over a wound. Sterile dressings are those which are free from germs prior to use and are preferable to unsterile dressings.
Purpose of Dressings
- To assist in the control of bleeding
- To absorb blood and wound secretions
- To prevent additional contamination
- To relieve pain
Types of dressing
There are two types of dressing
- Adhesive dressing, this type of dressings are used for dressing small cuts and grazes. They consist of a gauze or cellulose pad and an adhesive backing.
- Non adhesive dressing is a type of dressing used to dress large size area wound unlike that of adhesive dressing.
Dressing procedure
To apply clean dressing materials at home, hand washing, boiling the dressing materials for 15 minutes, and then drying the dressing materials without contamination is the primary necessity.
If available, ironed clothes or the inner surface of a folded cloth can be used for immediate use. Do not touch or breathe or cough on the surface of a dressing that is to be placed next to wound.
Bandages
A bandage is a strip of woven material used to hold a wound dressing or splint in place. It helps to immobilize, support and protect an injured part of the body.
Functions of bandages
- To assist in the control of bleeding
- To absorb blood and wound secretion
- To prevent additional contamination
- To ease pain
- Control or reduce swelling
- Lift and transport casualty
- Secure dressing and splint in position
- Assist in immobilization
Kinds of Bandages
The most useful commercially available bandages include:
- Gauze bandages usually in roles of 1 meter long and 3, 5 or 8 cm wide.
- Elastic bandage of woven material in various widths and lengths.
- Triangular bandages.
- A binder of muslin (many tailed bandage) to be applied to the chest or abdomen (a large towel or part of a sheet can substitute for a binder). It is rarely used to cover large area of abdomen and chest.
- Other emergency bandages can be formed from handkerchiefs, household linen, belts, ties, socks or stockings.
- Combinations of dressing and bandages.
- Special pads.
Elastic Bandages
They are expensive but can be laundered and used repeatedly for a number of purposes. In using elastic bandages, the first aider must take great care not to stretch the material too tightly. Putting an elastic bandage too tight will hinder or constrict blood flow.
Gauze Bandages
Skill is necessary in applying a gauze bandage to prevent its slipping and stretching. Gauze can be used as a bandage, almost on any part of the body. Never apply wet gauze it will shrink as it dries and become too tight.
A gauze bandage can be used in different ways:-
- Circular bandages
- Spiral bandages
- Figure of eight bandages (for joint areas )
- Finger tip bandages ( formerly called recurrent )
Triangular Bandages
- Triangular bandages are useful as an emergency cover for the entire scalp, and foot or any large areas. Such a bandage also is used as a sling for fracture or other injury of the arm or hand.
- The triangular bandage can be used as a circular, spiral or figure of eight bandage. It can also be used as a tie for a splint, as a constricting band or as a tourniquet.
Adhesive -Strip Dressings
- It is used for small wounds following through cleaning.
General Principles
- A bandage should be snug (not too loose and not too tight).
- To ensure that circulation is not interfered with.
-
- Leave the person’s fingertips and toes exposed.
- Watch for swelling, change of color and coldness of the tips of fingers or toes indicating interference with circulation.
- Loosen bandages immediately if the victim complains of numbness or tingling sensation.
- Never apply a tight circular bandaged about a person’s neck. It may cause strangulation.
Methods of applying bandages on different locations
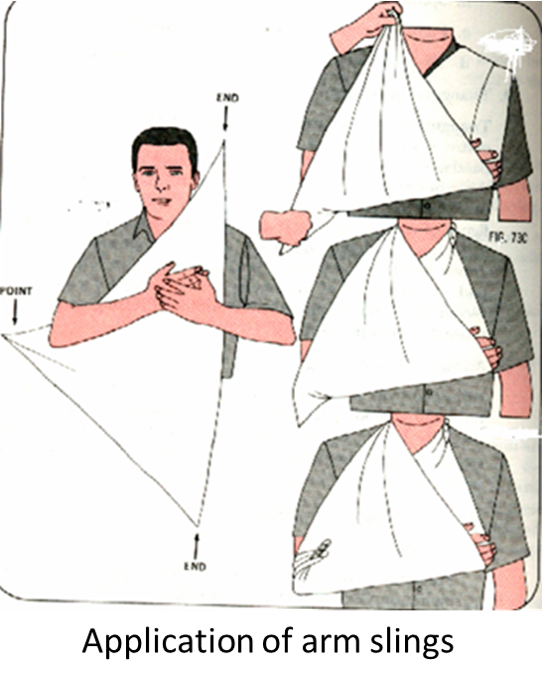
Arm Sling
- Prepare a triangular bandage.
- Place one end of the bandage over the injured shoulder and let the other end hang down in front of the chest parallel to the side of the body.
- Carry the point behind the elbow of the injured arm.
- Carry the second end of the bandage up over the shoulder and tie the two ends together at the side of the neck not over the spine.
- Bring the point of the sling and tie it.
- Make sure the ends of the fingers extend just beyond the base so that you can observe whether or not the circulation is cut off.
- In all cases of fore arm or hand injury adjust the sling so that the hand is elevated 10 or 12 cm above the level of the elbow.
Triangular Bandage Folded as a Cravat (Neck Tie)
To make a cravat bandage bring the point of a triangular bandage to the middle of the base then fold length wise along the middle until you obtain the desired width.
Triangular Bandage for the Scalp and Forehead
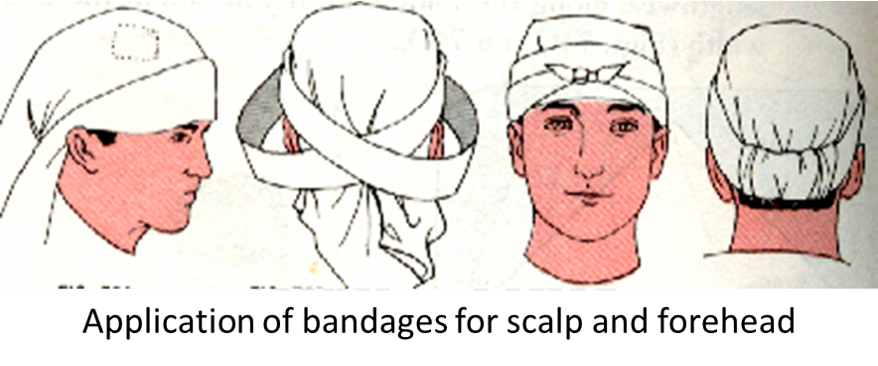
- Fold a hem about 5 cm wide along the base.
- Place, compress and put the dressing in place with the hem on the outside.
- Place the bandage on the head so that the middle of the base lies on the forehead close down to the eyebrows and the point hangs down the back.
Cravat Bandage for Forehead, Ears or Eyes
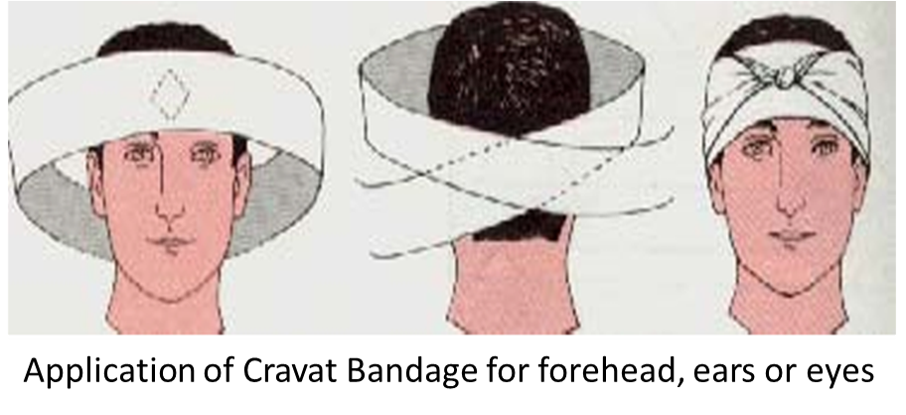
- Place the center of the cravat over the compress that covers the wound.
- Carry the ends around to the opposite side of the head and cross them.
- Bring them back to the starting point and tie them.
Cravat Bandage for Cheek or Ear
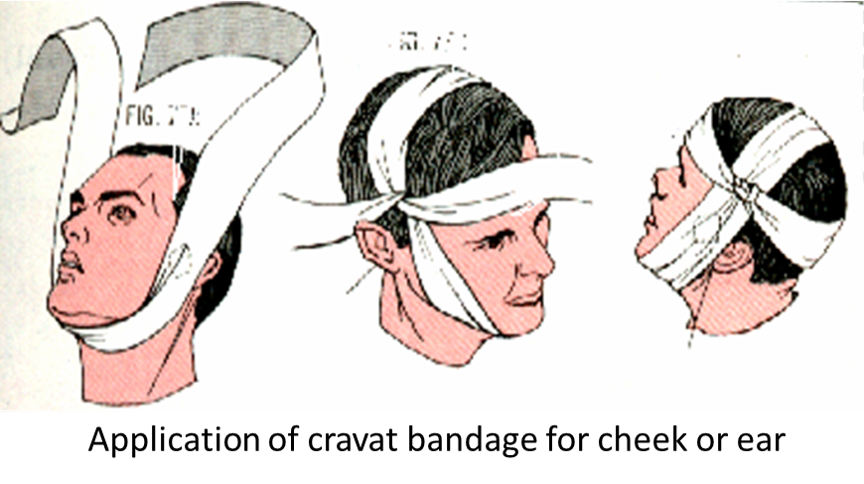
- Carry one end over the top of the head and the other under the chin.
- Cross the ends at the opposite side, brining the short end back around the forehead and the long end around the back of the head.
Anchoring a bandage

- Place the end of the bandage on a base at the starting point.
- Encircle the part allowing the corner of the bandage end to protrude.
- Turn down the protruding tip of the bandage and encircle the part again.
Securing of a bandage
There are several ways to secure a bandage in place (safety pin, applying adhesive tape, bandage clip, tucking in the end and tying).
Methods of bandaging
Circular turn
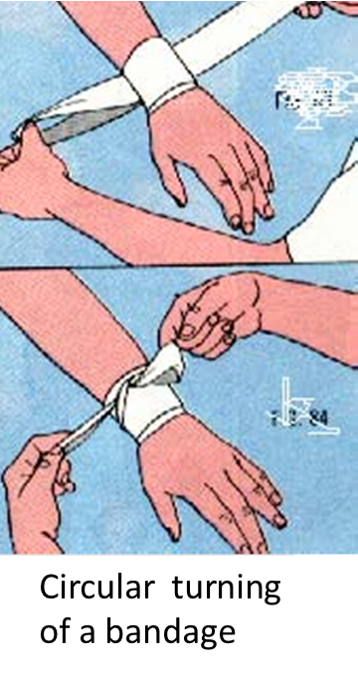
Simply encircle the part with each layer of bandage super imposed on the previous one. It is simplest of all bandage turns, however, its use is limited to covering parts of uniform width such as the toes and head.
Open and closed spiral bandage of the limb
It is a continuous encircling of the area to be covered with spiral turns spaced and closed. The bandage is completed by tying off. It is used temporary for splinting and holding a large burn dressing in place.
Figure of eight bandage for hand and wrist
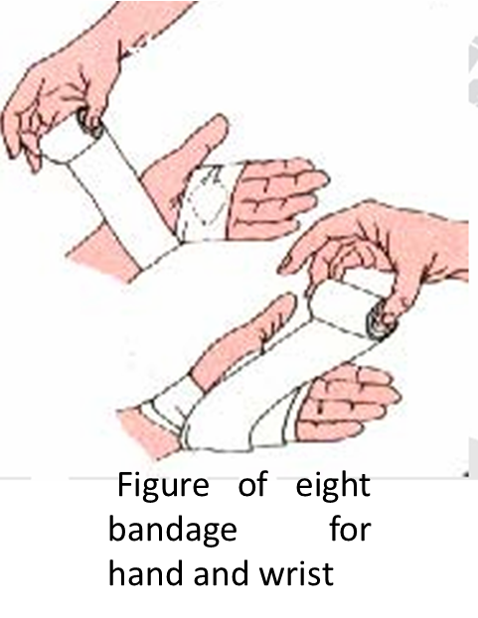
- Anchor the bandage with one or two turns around the palm of the hand.
- Carry it diagonally across the front of the wrist and around the wrist.
- Again carry it diagonally across the front of the wrist and back to the palm. It is repeated as many times as necessary to fix the dressing properly.
- Complete it by tying off.
Finger tip bandage
This is a series of back and forth runs called recurrent turn held in place by circle and spiral turns.
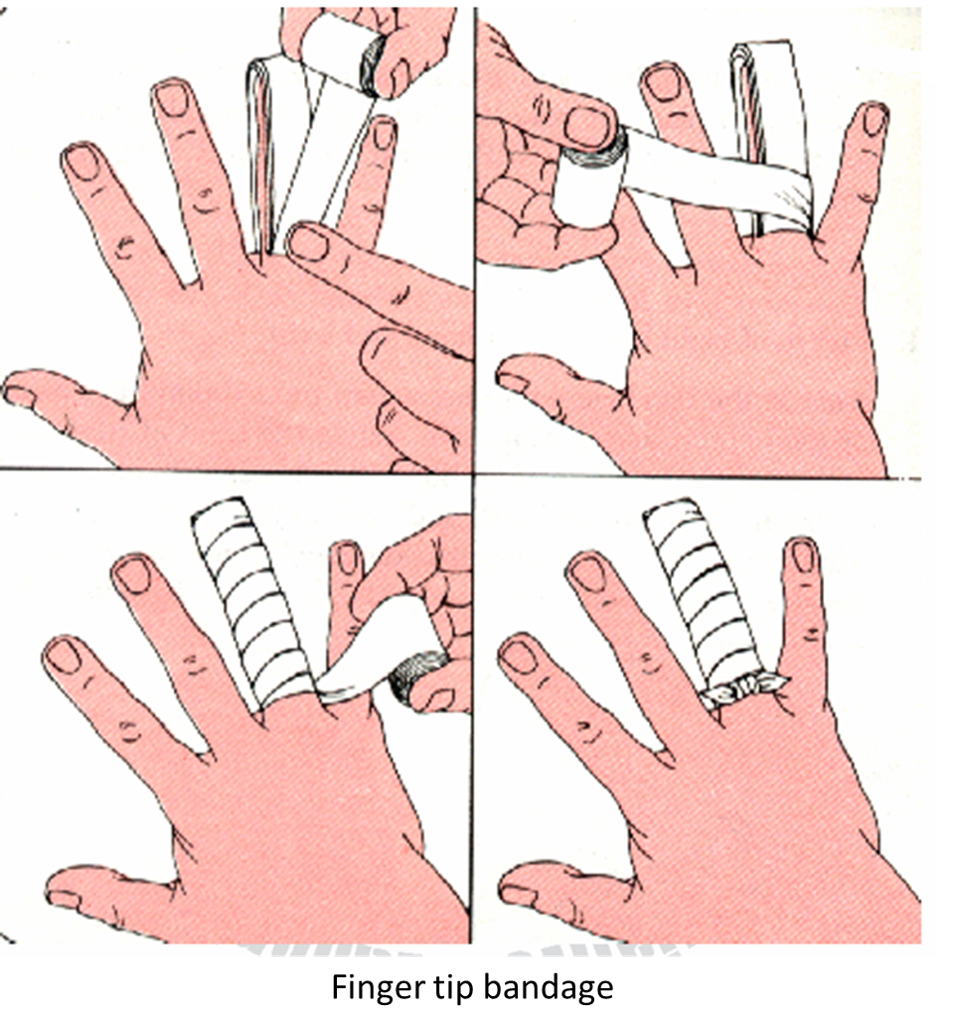
- It is normally used to bandage fingers; the bandage may be adapted to bandage the toes, scalp or stumps of limbs.
- This bandage is held in place with circular turns.
- From the finger or toe, take the end of the bandage diagonally across the back of the hand to the wrist, encircle one or more times from the opposite side of the wrist.
- Continue to the finger and loop.
- Repeat the figure of eight several times and tie off at the wrist.
- Secure by tying.
Figure of eight bandage for the ankle joint
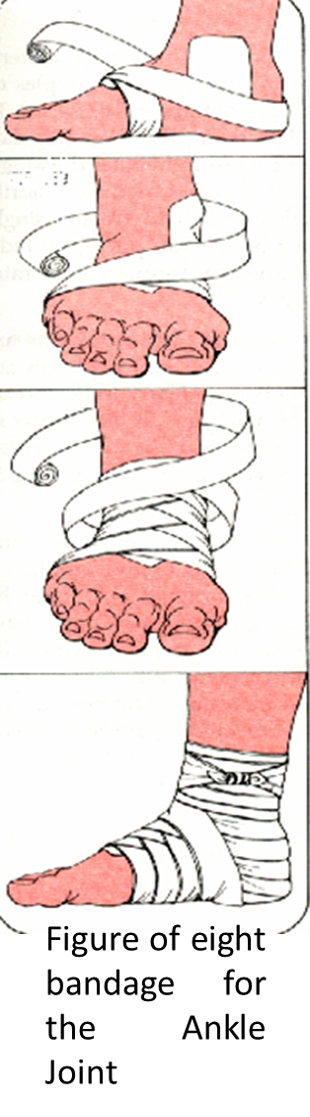
- Anchor the bandage on the instep and take two or three additional turns around the instep and foot.
- Carry the bandage diagonally upwards across the front of the foot then around the ankle and diagonally downwards.
- Occasionally use an extra turn around the ankle and complete by tying off.